Explore full power of Eurus Theme
Nails and Cuticles
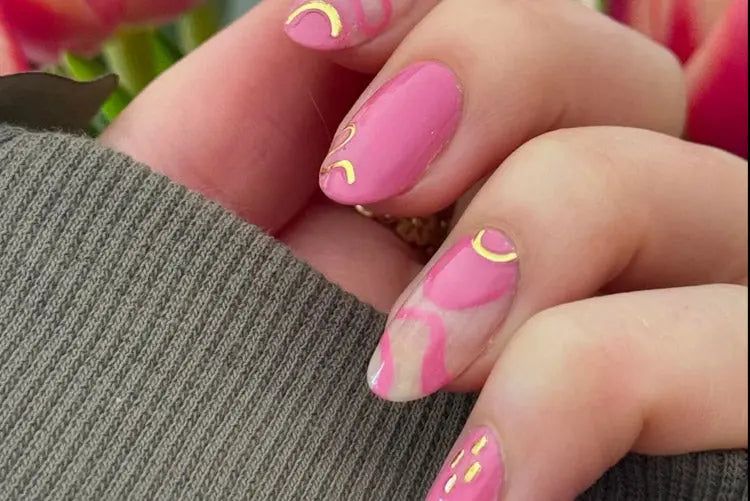
Nails and Cuticles
by Deborah Lippmann on Jul 15 2024
Maintaining healthy nails requires a combination of good habits and the right products. Here are some essential products you might need for optimal nail care:
Nail Clippers
- Purpose: To keep nails trimmed and free from splits or snags.
- Tip: Use sharp, good-quality clippers and trim nails straight across to prevent ingrown nails.
Nail Files
- Purpose: To shape the nails and smooth out any rough edges.
- Tip: Use a gentle, fine-grit nail file and file in one direction to avoid weakening the nails.
Extra tip: If your nails are really thin, when approaching the nail with the file approach it from slightly beneath the nail versus straight on.
Shop Nail Files
Cuticle Remover, Cuticle Cream and Oils
Cuticle Remover
Purpose—remove dead cuticle from the nail plate and
Apply once a week and gently push back cuticles with a wooden stick rather than cutting them.
Cuticle Cream and/or Oil
- Purpose: To moisturize and soften cuticles, preventing them from becoming dry and cracked.
- Tip: Apply daily and gently massage into the skin and nail.
Shop Cuticle Care
Hand Cream
- Purpose: To keep hands and nails hydrated. Rich Girl hand cream has the added benefit of Broad Spectrum SPF 25
- Tip: Look for creams with ingredients like shea butter, vitamin E, and natural oils.I highly recommend using sunscreen on your hands to protect them from the elements. Our hands spend a lot of time in the sun and age faster than the skin on our face because we don’t care as much for them.
Shop Rich Girl Hand Cream
Cotton
I recommend cotton that is lint free. This will keep all of those little fuzzy pieces that show up under your nail polish (Clever little buggers! we never know where they come from) at bay.
Base Coat
- Purpose: To protect nails from staining and to create a smooth surface for nail polish.
- Tip: There are many base coats that care for different problems we might have with our nails. Choose a base coat that also offers strengthening benefits if your nails are weak. Or a ridge filling base coat like my All About the Base if your nails are uneven. Choose a base coat like Genie in a bottle if you are wanting to slightly disguise discoloration in your own nail and brighten the look of your nail.
Tip: ONLY USE ONE BASE COAT AT A TIME
Shop Base Coats
Nail Polish
- Purpose: To add color and style to nails.
- Tip: Opt for polishes that are free from harmful chemicals like formaldehyde, toluene, and DBP (dibutyl phthalate). Deborah Lippmann gel Lab Pro Color nail polish is 21-Free.
- Polishing tip: When using the deborah lippmann Gel Lab Pro Color the formula is self-leveling. Take your time when polishing and resist the temptation to ‘over’ polish.
Also, capping the tip of the nail with base coat, both coats of color and top coat by very lightly running the brush across the very tip of your nail. I really recommend turning the brush upside down which leaves the bristles facing the ceiling. Approach the tip of the nail either ever so slightly from beneath the tip—or have the brush face the tip of the nail and very lightly let those bristles do the work and just lightly cap the tip. This will give you several more days of wear.
Shop nail polish
Top Coat
- Purpose: To seal in nail color and add shine and protection.
- Tip: A good top coat can extend the life of your manicure and prevent chipping.
Shop Top Coats
Nail Strengthener
- Purpose: To fortify weak or brittle nails.
- Tip: Use regularly if you have nails that break or split easily.
Hard Rock nail strengthener is our rock solid choice to strengthen and protect, this protein-rich treatment encourages healthy nail growth. It's especially beneficial for weak nails or post gel and artificial nail removal.
Shop Hard Rock nail strengthener
Nail Polish Remover
- Purpose: To safely and effectively remove nail polish.
- Tip: A non-acetone formula is known to be gentler on your nails however you must be really patient when trying to remove a shade with a darker pigment or shimmer. If you opt for 100% Acetone use a very small amount and avoid getting it on your cuticle and surrounding skin. My recommendation is to choose a polish remover that contains acetone and also treatment ingredients like lavender and aloe. Mine is called The Stripper because it ‘takes it all off’ and The Stripper doesn’t dehydrate the nail.
Tip—do not ever pour polish remover into your polish trying to ‘thin’ out the polish. Since polish remover is designed to break down the dried polish on your nail it will also break down the formula that is inside your bottle.
Shop nail polish removers
Nail Brush
- Purpose: To clean nails and remove dirt from underneath them.
- Tip: Use a gentle brush with soft bristles to avoid damaging the nail surface or cuticles.
Healthy Lifestyle
- Purpose: Diet and habits play a big role in nail health. DRINK WATER WATER WATER is my mantra! Hydrate from the inside out!
- Tip: Ensure you consume a balanced diet rich in vitamins and minerals, stay hydrated, and avoid excessive exposure on your hands to harsh chemicals or water.
Always use sunscreen on your hands to keep age spots at bay and keep your hands looking young!
Incorporating these products into your nail care routine can help maintain strong, healthy, and attractive nails.
Nails and Cuticles
How to Use Cuticle Remover for Perfectly Manicured Nails
by Deborah Lippmann on Jun 06 2023
Are you tired of dry, cracked cuticles ruining your perfectly manicured nails? Do you want a simple solution that will keep your cuticles soft and healthy? Look no further than cuticle remover! This miracle product is a must-have for anyone who wants to achieve salon-quality nails in the comfort of your own home. But how do you use cuticle remover effectively? In this blog post, I'll provide you with all the tips and tricks you need to know to achieve perfectly manicured nails.
Selecting the Right Cuticle Remover:
There are many different types of cuticle removers on the market, so it's important to select the right one for your needs. Look for a formula that is gentle on your skin but also effective at removing dead skin around your nails. Choose a product that contains moisturizing ingredients like lanolin or vitamin E to prevent dryness and irritation.
Preparing Your Nails:
Before you apply cuticle remover, it's important to clean and prep your nails. Remove any old nail polish and wash your hands thoroughly with warm water and soap. Then, dry your hands and use a cuticle pusher to gently push back your cuticles. This will help to expose more of the dead skin that needs to be removed.
Applying Cuticle Remover:
Using the applicator brush or dropper that comes with your cuticle remover, apply a small amount of the product to all of your nails. Be careful not to get the cuticle remover on your actual nails, as it can cause damage or discoloration. Let the product sit for about a minute so that it has time to soften the dead skin.
Removing Dead Skin:
After the cuticle remover has had time to work, use a cuticle pusher to gently remove the dead skin around your nails. Be careful not to trim too much or to cause bleeding. If you're new to using cuticle remover, start slow and work your way up to more aggressive removal.
Post-Removal Care:
After you've finished removing dead skin, it's important to care for your nails and cuticles to prevent drying or cracking. Use a moisturizing cuticle oil or cuticle cream to keep your cuticles soft and healthy. You can also buff your nails to a shine and add a topcoat of nail strengthener for extra protection.
Conclusion:
Using cuticle remover to achieve salon-quality nails is easy and affordable. Just remember to select the right product, prep your nails, apply the product carefully, remove dead skin gently, and care for your nails after the process is complete. By following these simple steps, you'll be on your way to perfectly manicured nails in no time. So go ahead and give cuticle remover a try – your nails will thank you!
Nails and Cuticles
How To Do A Waterless Manicure
by Deborah Lippmann on Jan 31 2023
What is a Waterless Manicure?
Simply put, it's the same as a standard salon mani, but without the water. It comes in handy for me on the set or backstage at Fashion Week.
What are the benefits of a Waterless Manicure?
Waterless manicures are more hygienic and sustainable. Water contains bacteria, and if mixed with soap, can be destructive to your nails. They take less time and can be done almost anywhere!
How To Do A Waterless Manicure
Cleanse the nails
Remove nail polish using The Stripper Lavender Nail Lacquer Remover. An award-winning, fast-acting nail polish remover infused with lavender essential oil and aloe vera extract to help keep nails moisturized. No white chalky residue.
Saturate a piece of cotton and gently hold on one nail, count to 5 and pull forward in an “S” shape to get the polish out of corners. Press lightly as you approach the tip to avoid straining or breaking the free edge. Repeat on the other 9 nails.
Shaping the Nails
Shape the nails into desired nail shape using the Deborah Lippmann Eco-File – a 240-grit emery board made of recycled paper.
Start from the outside edge of the nail filing toward the center, always in one direction. Never “saw” back and forth! Place the file along the nail sidewall and gently file parallel to the finger first and then gently from the outer edge of the nail and towards the center of the nail tip. Leave at least 1/8” of the nail straight along the sidewall before shaping the tip to the desired shape.
Repeat on both sides of the nail until the desired shape is achieved.
Using a Nail Buffer
Use sides 1 through 3 of the Smooth Operator 4-Way Nail Buffer on all nails to shape, smooth, buff, and shine. This buffer helps color adhere to the nail plate and extend the wear of your polish. It is very gentle and won’t leave scratch marks on your nails.
Gently dust the entire surface of each nail with each fabric 1, 2, and 3. Only use fabric #4 if you want a high gloss shine without the need for any nail polish. Never angle the Smooth Operator downwards towards the nail tip or apply too much pressure towards the tip which would put a strain on your free edge.
Side 1 – Coarsest side targets extreme nail ridges and bumps.
Side 2 – Refines nail ridges and bumps.
Side 3 – Smooths nail surface.
Side 4 – Provides high-shine gloss without lacquer.
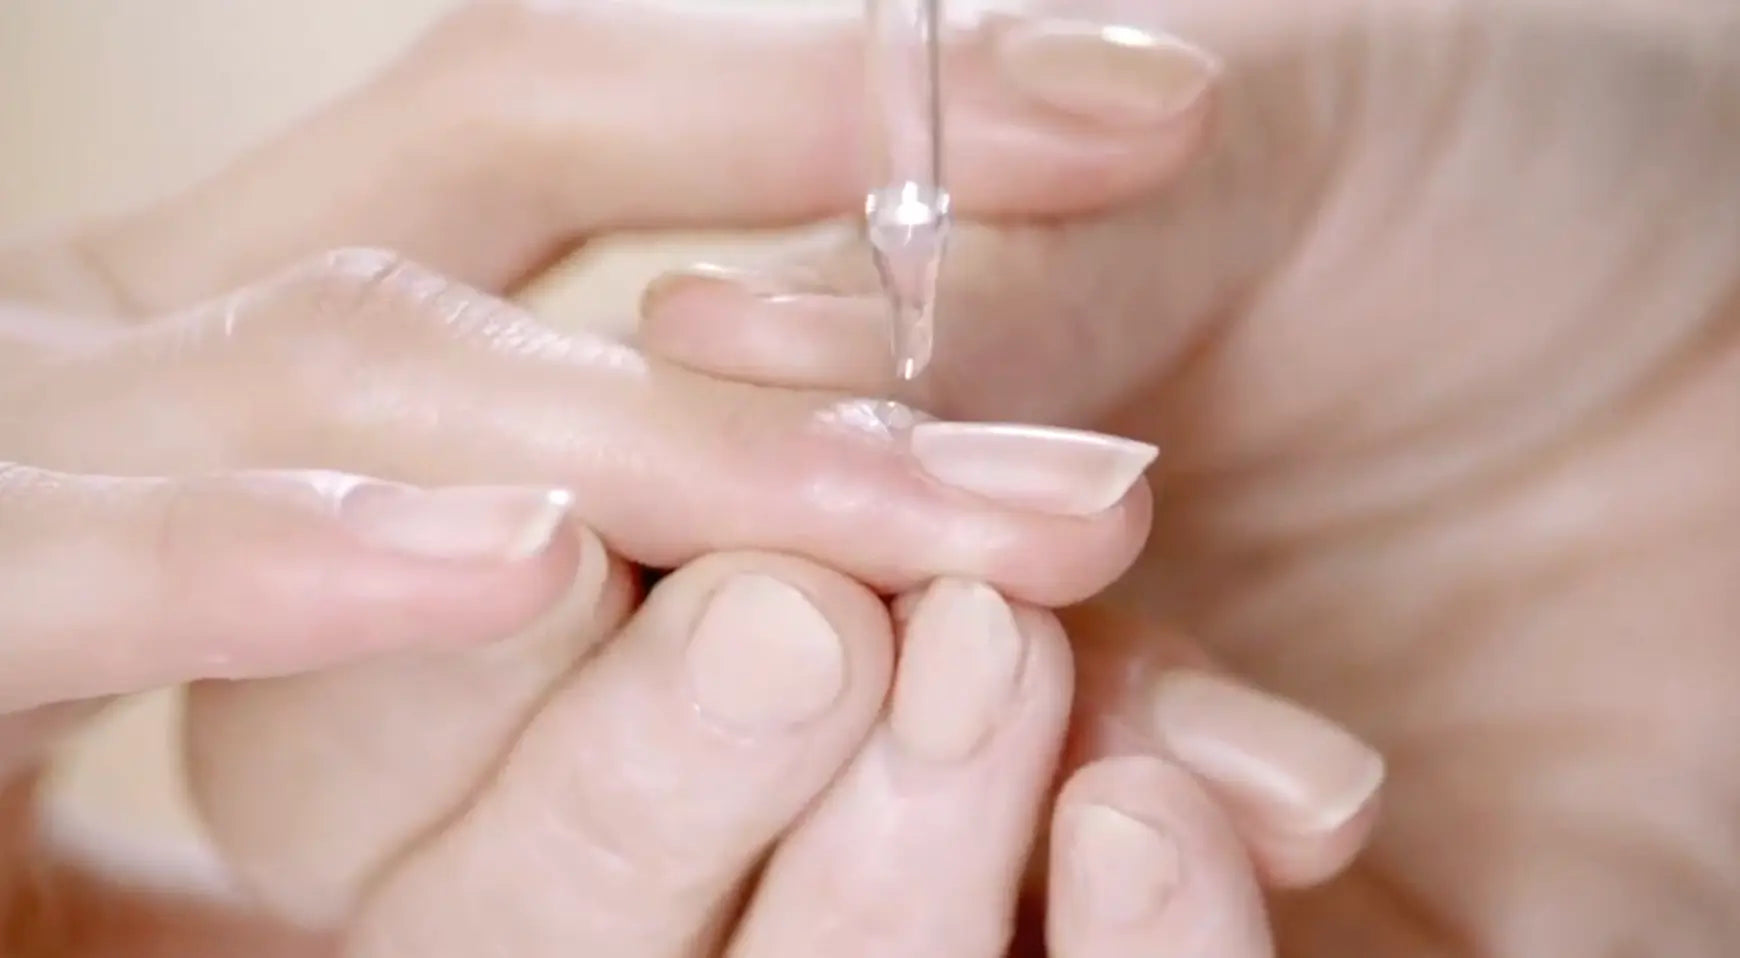
Using a Cuticle Remover to Exfoliate
Apply Cuticle Remover Exfoliating Cuticle Treatment liberally to each cuticle. Infused with Potassium Hydroxide, it helps loosen, soften and exfoliate dry and dead cuticles. No waiting or soaking is necessary.
Using the arched end of my custom Cuticle Pusher – a perfectly shaped stainless steel cuticle pusher that fits the natural curve of the nail - gently push cuticles back toward the knuckle. Make small circular movements when working from corner to corner. The opposite end is to help target more stubborn cuticle build-up. *Nothing should ever be remotely painful or even uncomfortable when pushing cuticles back. Remove any excess product with a clean towel.
Use the Cuticle Nipper to carefully remove any loose pieces of hanging skin that may be left after a proper cuticle pushing:
When using a cuticle nipper, eyeball the piece of skin that is sticking out. Align the nipper on that piece of skin and clamp the cuticle nipper. Release the nipper.
Never pull the skin off when releasing the cuticle nipper.
Using the Hand Scrub
Apply a quarter-size amount of Marshmallow Whipped Hand & Cuticle Scrub with AHA & BHA on the top of one hand and rub in a circular motion for 30 seconds. Repeat with the other hand. Wipe away the remaining product with a wet wipe or towel.
This unique whipped hand scrub that combines AHA and BHA fruit and plant acids along with Perlite – biodegradable volcanic ash – helps lift dead skin cells and clear pores revealing brighter, glowing skin. Infused with the cooling and soothing properties of Marshmallow Root Extract, it helps calm irritated skin while Glycerin and Coconut Oil deeply moisturize. Hands and cuticles feel softer, smoother, and younger-looking at first application.
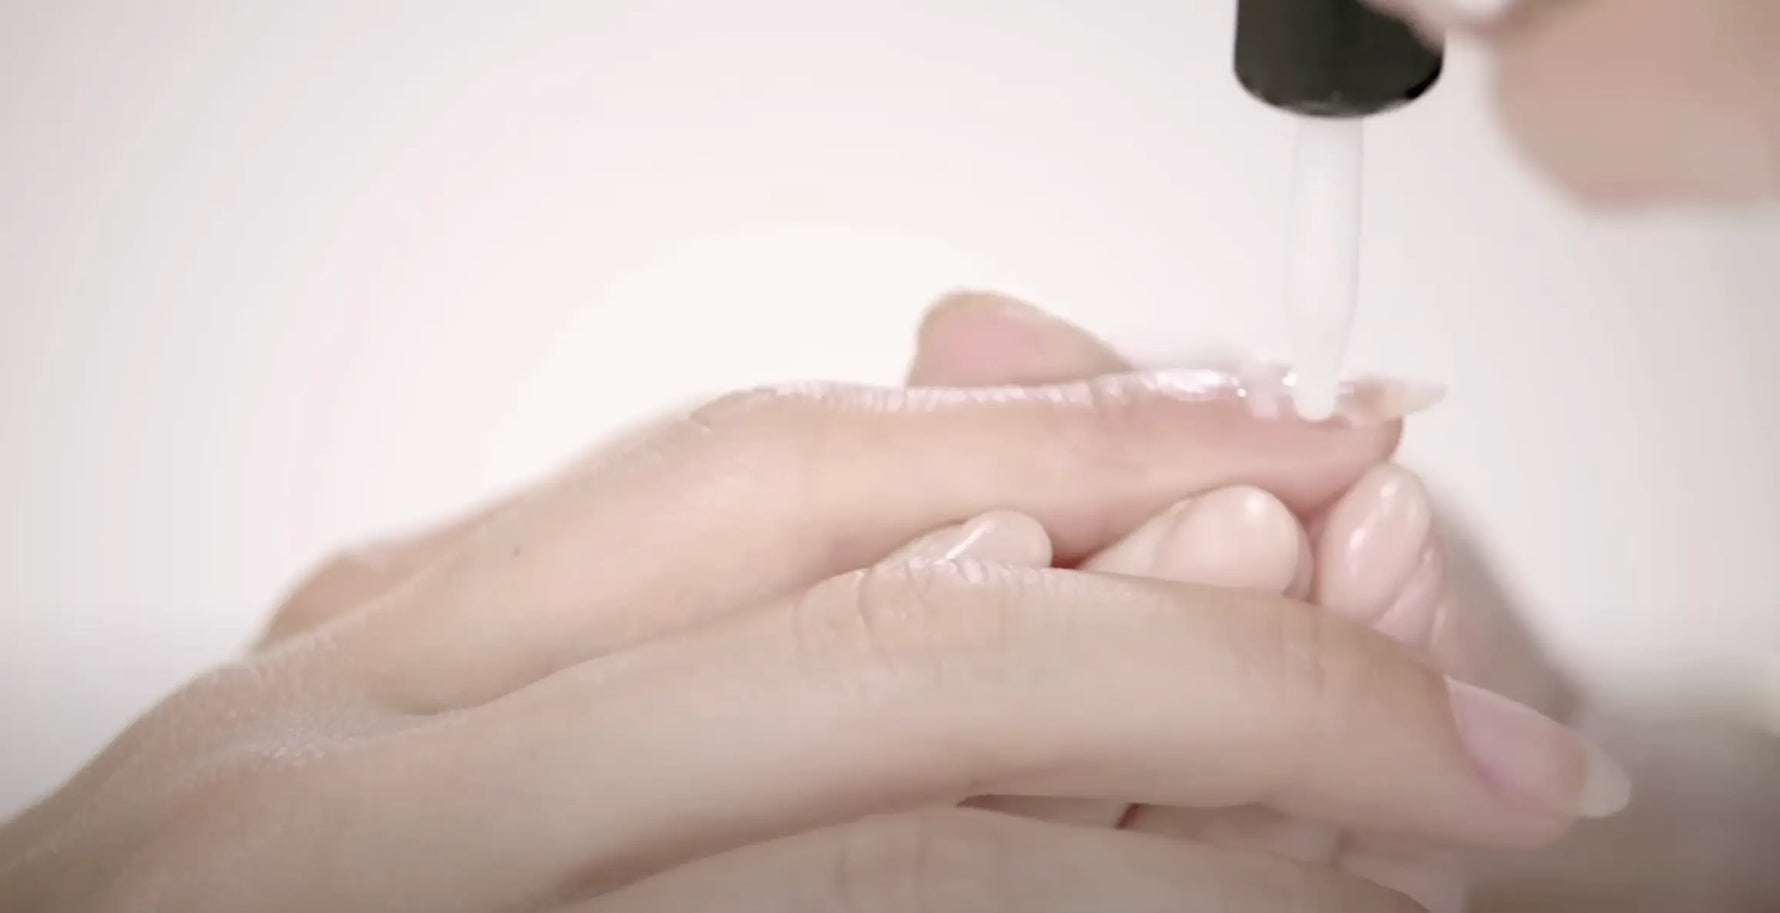
Hydrate your Cuticles with Cuticle Oil
Apply a tiny drop of Cuticle Oil Hydrating Cuticle Treatment at the base of each nail and massage it into the cuticle. Infused with Coconut Oil and Vitamin E-rich Jojoba Seed Oil, it deeply penetrates cuticles to help soften, heal and protect dry, cracked cuticles. Leaves cuticles feeling softer and moisturized.
Moisturize Your Hands
Apply Rich Girl SPF 25 Hand Cream on each hand and up to the elbows. Perform a massage on the cuticle area. This will help increase blood circulation to the nail matrix area (area between the first knuckle and under your cuticle) and in turn help stimulate cell regeneration. This award-winning SPF 25 hand cream has broad-spectrum UVA and UVB protection to help prevent premature skin aging and burns to the skin. It is infused with Shea butter, Avocado, Jojoba oil, and Cyclomethicone to provide continued comfort and hydration.
Nail Preparation and Nail Polish Application
Apply 1 drop of 2 Second Nail Primer Cleansing Prep about 2” above the center of each nail and wipe dry. This fast-evaporating primer instantly removes dirt, oil, and any residue for a longer-lasting manicure.
If not applying nail polish, use side #4 of Smooth Operator 4-Way Nail Buffer to buff to a high shine and to give nails a natural, high gloss.
Deborah Lippmann Nail Polish technique:
Apply 1 coat of Deborah Lippmann Gel Lab Pro base coat and allow 2 minutes to dry. This healthy alternative to gel manicures delivers extended wear and a cushiony plumped look to ANY nail polish without UV lamps, tools, or nail damage. It is easy to remove with any polish remover. No soaking or scraping nails ever again. In a consumer study, 97% of participants saw longer wear, longer-lasting shine, and salon-quality results.
Base coats help the color adhere to the nail plate and provide longer-lasting wear to any nail polish. They also prevent nails from becoming stained especially when using dark colors.
Other Deborah Lippmann base coats include Hard Rock (nail strengthener), All About that Base (CC base coat), and Genie In A Bottle (nail tone perfector).
Apply a thin layer starting with one stroke down the center of the nail.
Apply one stroke down each side of the nail.
Take the very tip of the brush and cap the edge of the nail to finish.
Apply 2 thin coats of Deborah Lippmann nail polish color and allow 2 minutes to dry in between each coat. You must allow the solvents in the polish of each coat to evaporate completely before applying the next coat. This promotes longer wear and less chipping!
To finish, apply 1 thin coat of Deborah Lippmann Gel Lab Pro top coat and allow 5 minutes to dry. It is imperative that drying time is respected to allow polymers to evaporate. If the manicure is rushed, users may find bubbles or color may peel off in a sheet, not adhering to the nail properly.
Other Deborah Lippmann top coats include Hard Rock (nail strengthener) and Addicted To Speed (fast-drying top coat) and High & Dry (super-quick dry top coat with hemp seed extract).
Apply 1 or 2 drops of The Wait Is Over (quick dry drops) about 2” above the center of each nail and wait a few seconds to dry. This fast-evaporating formulation with special conditioning agents form a protective barrier on the nail that dramatically accelerate nail polish drying time to promote flawless-looking manicures.
Massage a small amount of The Cure Ultra Nourishing Cuticle Repair Cream to the surrounding cuticle area of each nail. Infused with a powerful dose of patented Raspberry Stem Cell extract, Red Algae, Shea Butter, Sodium Hyaluronate, and vitamins A, C, and E, this luxurious cream instantly relieves dry cuticles as it repairs and protects. Apply frequently throughout the day to maintain softness and prevent dryness.

Nails and Cuticles
How To Stop Biting Your Nails (from a Nail Expert and former nail biter)
by Deborah Lippmann on Jan 25 2023
Nail biting can be a bad habit that’s hard to break. Often, people don’t realize how much time and energy they spend doing it until they try to stop. Fortunately, there are some tips and tricks that you can use to stop the habit for good.
Identify Your Triggers
The first step in breaking any bad habit is understanding why you do it in the first place. Are you stressed? Bored? When do you tend to bite your nails most often? Being aware of your triggers can help you gain better control over your behavior and make it easier to find more productive ways of dealing with difficult emotions or situations.
Keep Your Nails Short
One way to make it more difficult to bite your nails is by keeping them short. This will subconsciously remind you not to bite them when they start getting long enough that it becomes tempting.
Find Alternatives To Nail Biting
If boredom or stress is one of the reasons why you bite your nails, then finding an alternative activity may be helpful in breaking the cycle of nail-biting behavior. Try using a fidget toy or squeezing a stress ball instead when those feelings come up so that nail-biting isn’t an option anymore - at least not until you’ve worked through whatever emotion triggered it in the first place!
Get Professional Help If Needed
If none of these strategies have been successful after several weeks or months of trying, then professional help may be necessary in order for you to finally break this pesky habit once and for all! A therapist or psychologist can provide additional guidance on how best to approach this problem and what other methods might work better for you personally than others would—so don’t hesitate to reach out if needed!
Nails and Cuticles
The Benefits of Using Cuticle Oil
by Deborah Lippmann on Jan 25 2023
Why Should I Use Cuticle Oil?
Taking proper care of your nails and cuticles is essential to keeping them healthy and strong. One key step in this process is using cuticle oil, which helps nourish your nails and keep them looking their best. Let’s take a closer look at why you should regularly use cuticle oil.
Moisturizing Properties of Cuticle Oil
Cuticle oil helps keep your skin moisturized, helping them stay strong and healthy. Additionally, the natural oils found in many cuticles can help hydrate the skin around the nail beds, reducing hangnails and keeping them from becoming dry and brittle. My cuticle oil is extra hydrating with rich Coconut Oil and Vitamin E Jojoba Seed Cuticle Oil to deeply penetrate the skin to help soften, heal and protect dry, cracked cuticles.
How Often Should I Use Cuticle Oil?
One of the greatest benefits of using cuticle oil is that you can see results almost immediately! Apply a few drops onto each nail bed once or twice daily and massage into your cuticles for maximum hydration and nourishment benefits – it’s just that easy!
Keeping Nails Looking Great
If you want your nails to look their best, you need to nourish them with cuticle oil. Regular use of cuticle oil can help promote healthy nail growth - so if you’re trying to grow out your nails or prevent splitting or peeling, it’s definitely worth giving cuticle oil a try!
Cuticle Oil for Men and Women
Cuticle oil is an essential part of anyone's nail care and beauty routine as it helps keep our nails looking their healthiest. Not only does it strengthen our nail beds but also helps make our nails appear shinier and glossier than ever before. Plus, it hydrates the skin around our nail beds that prevents splitting or cracking over time. And with results showing almost instantly after application, there's no excuse not to give this miracle product a try today! So go ahead - give your nails some love with a little bit of cuticle oil!